Leon's Aquatic Odyssey: Unraveling the Lake Shrine Puzzles in Resident Evil 4 Remake
The murky waters of the lake in the Spanish countryside held more than just reflections of a troubled sky; they concealed the path to salvation, or perhaps deeper into the abyss. For Leon S. Kennedy, the journey to rescue the President's daughter had descended into a nightmarish pilgrimage, where ancient churches were locked not by faith, but by arcane puzzles scattered across the placid, deceptive surface of the water. The key to the church, and thus to Ashley, lay fragmented, guarded by silent stone sentinels whose heads were sequestered in shrines on opposite shores. The map in his possession updated, not with roads, but with two spectral markers upon the lake—a silent summons to a dual trial of wit and will.
As one of the defining horror experiences of the era, Resident Evil 4 Remake masterfully wove visceral combat with cerebral challenges. The lake sequence stood as a testament to this design, a tranquil yet treacherous interlude where the silence was often more frightening than the grotesque cries of the infected. Leon's mission was clear: solve two distinct conundrums to retrieve the statue heads, the final pieces needed to breach the church's defenses. The boat, once a mere vessel, became his sole sanctuary in this aquatic expanse, a fleeting haven between bouts of terror.
🚤 Preparing for the Voyage: Armaments and Awareness
Crossing the lake was no leisurely cruise; it was an incursion into hostile territory. Prudent preparation was the thin line between survival and a watery grave.
Essential Arsenal for the Depths:
-
The Red9 Handgun: A voyage to the abandoned boat at the lake's heart yielded one of the most formidable early-game treasures. This pistol, a relic of precision, could be upgraded to a devastating power level of 2.7, becoming an indispensable tool against the horrors ahead.
-
Flash Grenades: These were not mere distractions but instruments of instant purification. A well-timed flash would annihilate the emerging tentacled Plagas parasites, turning certain death into a moment of brilliant, explosive relief.
-
A Keen Knife & Sturdy Armor: Before casting off, ensuring his blade was sharp and his attire reinforced was paramount. Close encounters were inevitable, and a reliable knife could mean the difference between a graze and a fatal embrace.
| Preparation Tip | Purpose & Benefit |
|---|---|
| Visit the Merchant | Stock up on healing items, ammo, and accept new requests for valuable spinel rewards. |
| Scout the Route | Mentally chart a path back to the boat—a crucial escape route from overwhelming hordes. |
| Manage Resources | Use the boat's safety to reorganize inventory, ensuring optimal loadouts for exploration and combat. |
The merchant's presence on the shore was a beacon of grim commerce, a place to barter for power and a temporary anchor to a fading reality. His requests, scattered like breadcrumbs, offered purpose amidst the chaos, guiding Leon toward hidden treasures and potent upgrades.
🧩 The First Shrine: Plagued Caverns and Painted Secrets
The first marker led to a cavern system directly across from the merchant's humble stall. This was no peaceful grotto; it thrummed with the guttural murmurs of the infected.
A Methodical Approach:
-
Clear the Chamber: Attempting the puzzle amidst the fray was folly. The caves housed a new, more volatile enemy type—villagers whose heads would grotesquely burst into writhing tentacles. Eradicating them first was a non-negotiable prelude to intellectual work.
-
Ascend and Observe: With the area secured, two ladders presented themselves. Climbing the first revealed the shrine's silent language: three yellow symbols painted on the rough cave walls. These pictograms, often spanning cracks and corners, required Leon to shift his perspective, angling his view to see their complete forms.
-
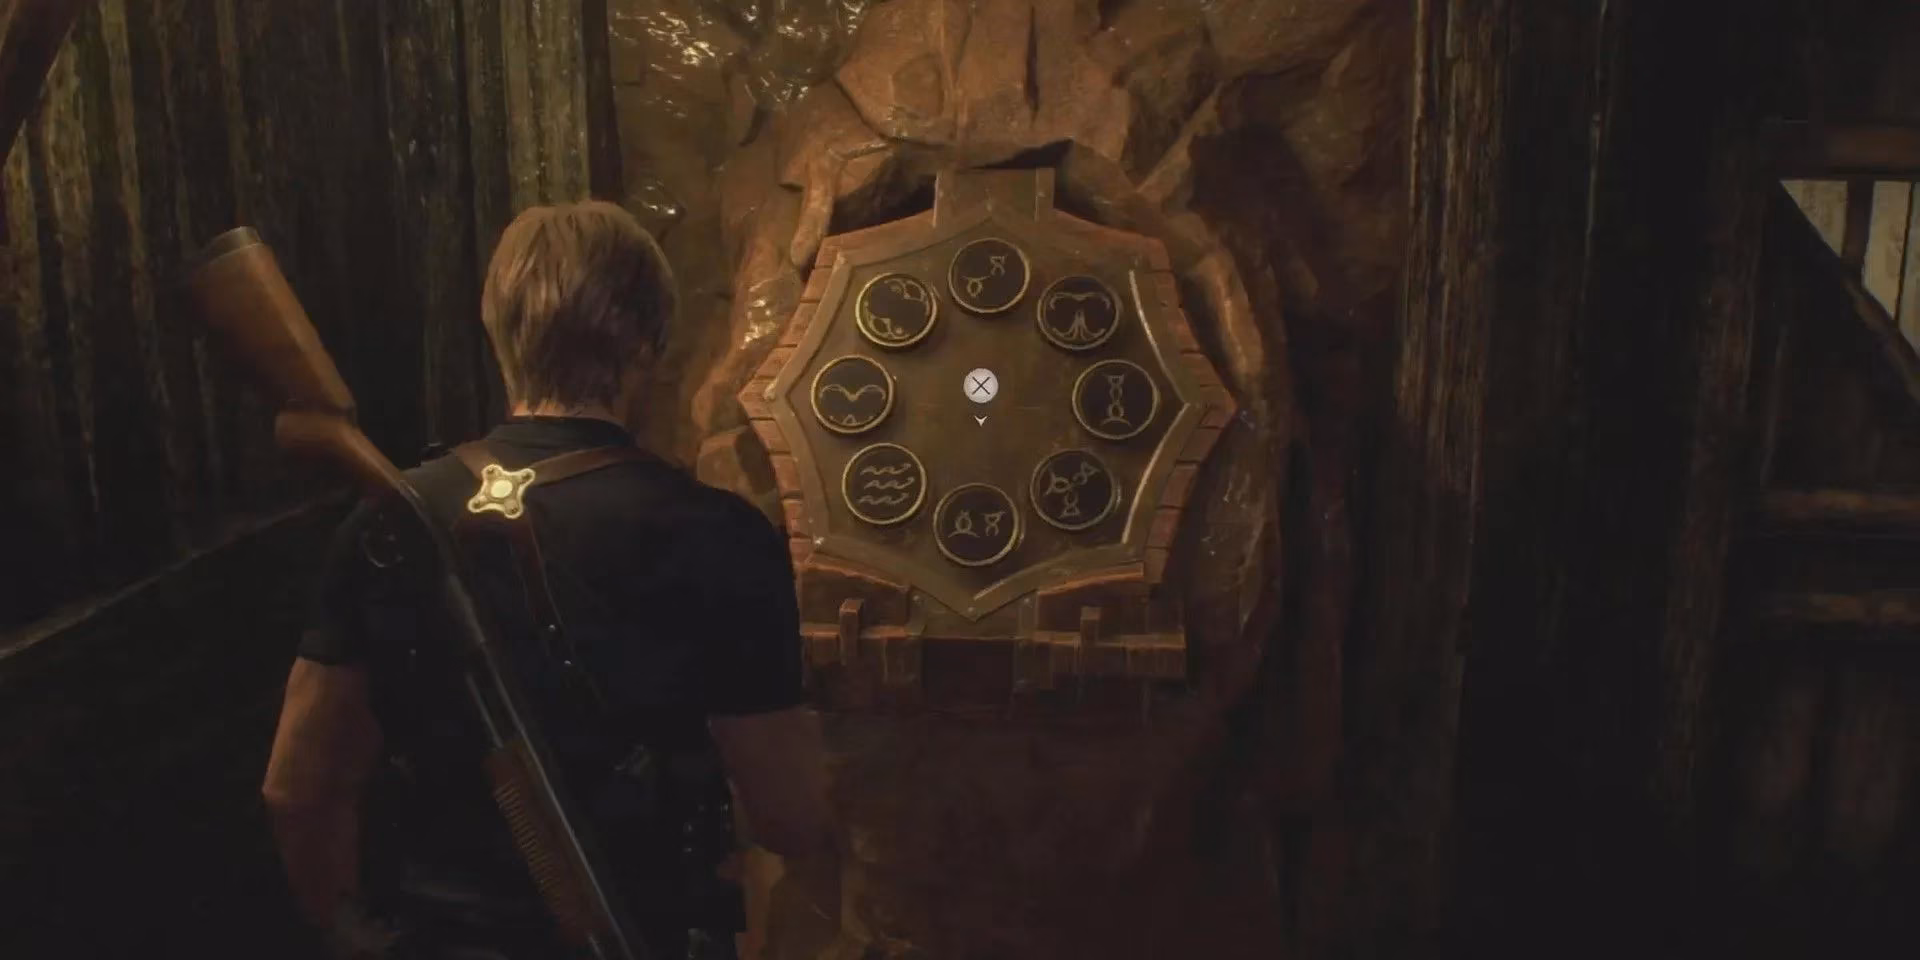
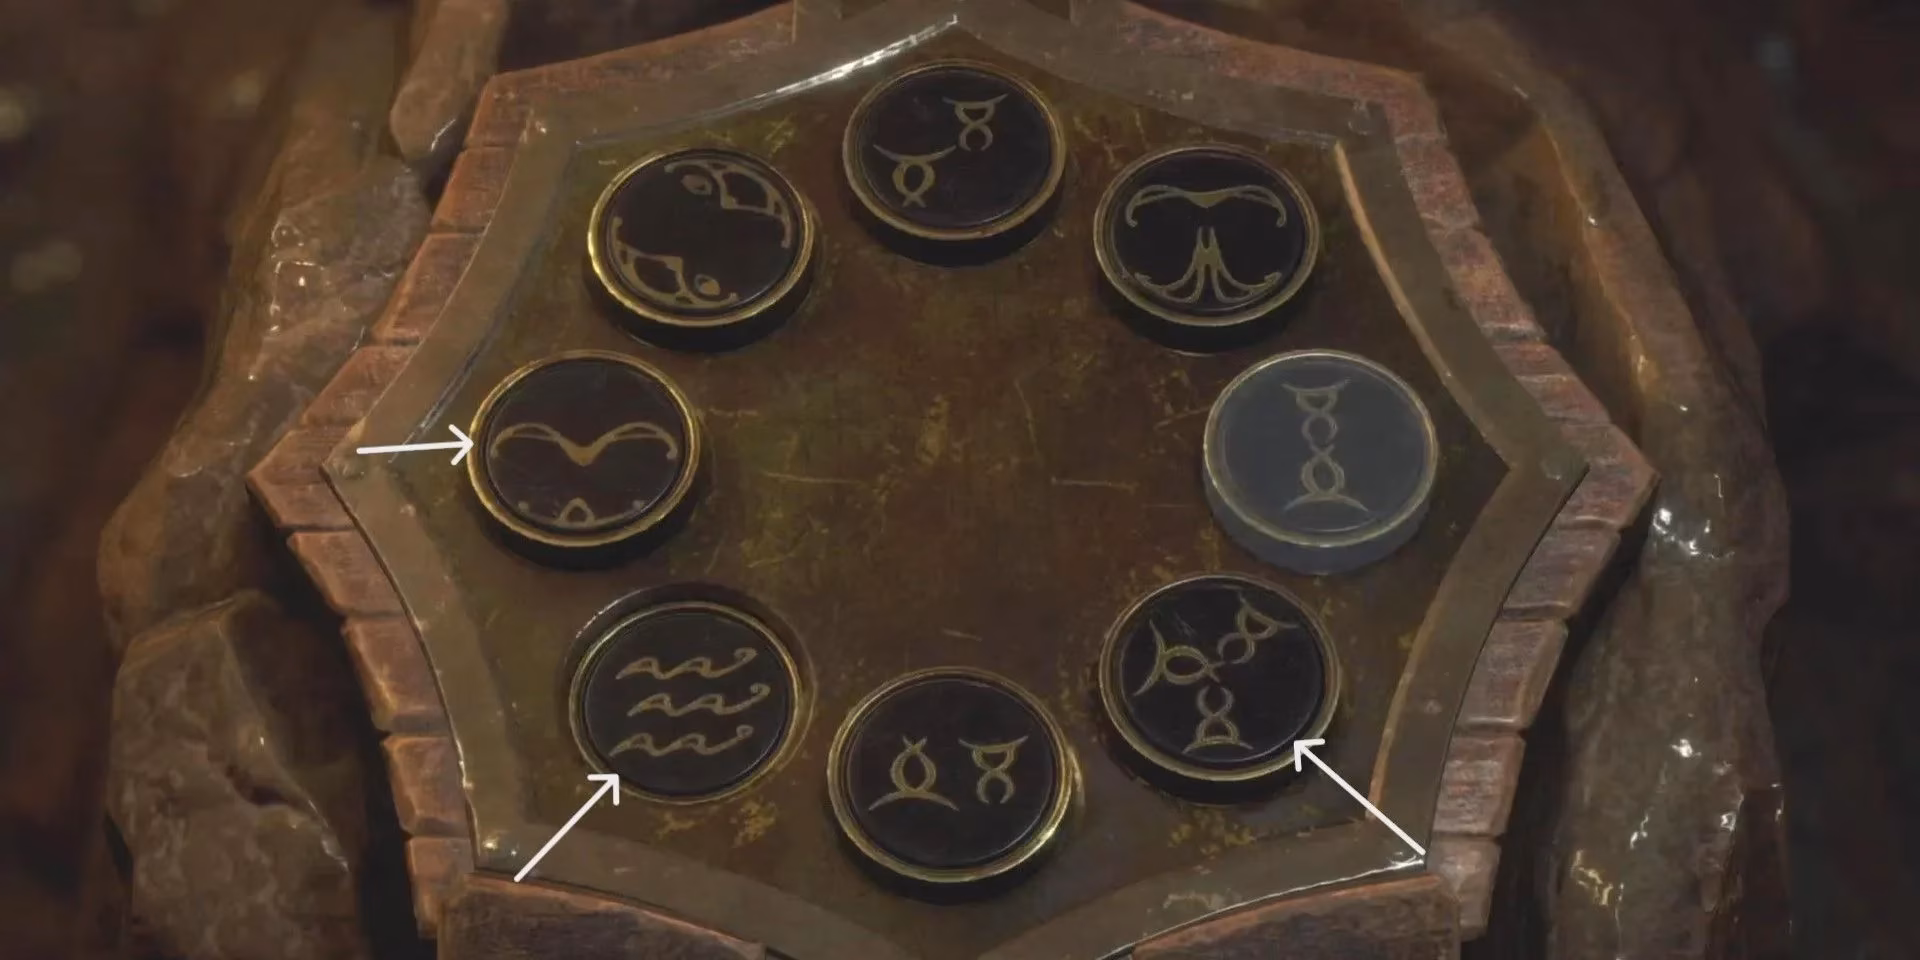
Decipher the Code: The third and final symbol was cleverly placed past the locked door itself, near the base of the second ladder. The interactive panel beside the imposing door awaited input. Here, the puzzle offered a sliver of mercy: the order of input did not matter. Simply replicating the three glimpsed symbols—a crescent, a rudimentary sun, a geometric shape—was the key.
With a resonant clunk, the mechanism yielded. The door swung open, revealing the precious stone head within, a cold, carved prize in the damp gloom. Before departing, a thorough search of the cavern's shadows often yielded glittering treasures, fleeting consolation for the horrors endured.
🧘 The Second Shrine: Silence and Elevated Insight
The journey to the second location offered a stark, almost eerie contrast. Where the first cave was a battleground, this smaller shrine was enveloped in an profound and unsettling quiet.
A Puzzle of Perspective:
-
A Peaceful Approach: No enemies lurked in the reeds or shadows here. The immediate threat was absent, replaced by the pure, pressing weight of the puzzle itself.
-
Look Upward: The solution lay not ahead, but above. The shrine's door was visible at the path's end, but the symbols to open it were hidden overhead. A sturdy ladder led to an upper ledge, a vantage point overlooking the sealed chamber.
-
Gather and Input: On this upper platform, the same three yellow symbols were displayed, waiting to be committed to memory. The area also housed several collectibles—perhaps a delicate porcelain, a gleaming gem—rewards for thoroughness.
With the symbols secured, Leon descended. Inputting the sequence into the panel—a mirror of the process from the first cave—granted him the Blasphemer’s Head. The second sentinel was now powerless, its guardian piece obtained without a single shot fired, a victory of observation over obliteration.
🔑 The Return: Treasures and the Path Forward
With both stone heads resting heavily in his inventory, the lake's purpose was fulfilled. Yet, the wise agent knew the journey was not merely linear. The lake was a hub, its islands and nooks holding secrets that could tip the scales in the grueling battles to come.
Final Acts Before the Church:
-
Complete Merchant Requests: Those who had accepted tasks like exterminating specific pests or locating rare artifacts could now fulfill them, earning spinels for critical weapon parts or upgrades.
-
Scour for Unique Treasures: The lake region hid unique valuables, such as the Wayshrine Key, which unlocked further secrets elsewhere. These were the whispers of a world beyond the immediate nightmare, offering both resources and fleeting narrative clarity.
-
A Moment of Respite: The boat ride back to the mainland was a chance to breathe, to watch the mist curl over the water one last time, a poetic calm before stepping back into the relentless storm of the village's central horrors.
The lake puzzles, in their elegant duality, encapsulated the soul of the remake: a beautiful, terrible dance between contemplation and carnage. They forced Leon—and the player—to shift rhythms, to value silence as much as gunfire, and to understand that in this corrupted world, the mind was as essential a weapon as the Red9. As the church doors finally creaked open, the aquatic interlude faded into memory, but the lessons learned in those damp caves—of preparation, perception, and perseverance—would resonate through every darkened corridor and desperate fight that still lay ahead in the quest to find Ashley.