Resident Evil 4 Remake Separate Ways DLC: Chapter 4 Walkthrough - Puzzles, Ingredients & Treasures
The flames consuming Luis Sera's secret laboratory cast a grim shadow over the beginning of Chapter 4 in Resident Evil 4 Remake's Separate Ways DLC. Arriving at the Castle, Ada Wong and Luis discover the Zealots have destroyed his lab and the vital suppressant samples within. Driven by a desire to help Leon and Ashley, Luis braves the inferno to salvage what he can, prompting Ada to follow and save him. With the original samples gone, Luis reveals a desperate plan: craft a new suppressant using three rare ingredients scattered within the Castle's depths. Their paths diverge here, setting Ada on a perilous quest through ornate halls and deadly puzzles to find the Red Ink, the Golden Bottle, and the elusive Blue Butterfly. Can she navigate the Castle's treacherous secrets and secure the temporary cure for Las Plagas? This walkthrough provides a detailed guide to conquering Chapter 4 efficiently, solving its intricate puzzles, and uncovering its valuable treasures.
🔥 The Suppressant Quest Begins
Luis's urgent need is clear: find the three components necessary to brew a new batch of the Las Plagas suppressant. These ingredients are hidden behind complex mechanisms and guarded by Salazar's forces:
-
Red Ink: Located within the Bindery.
-
Golden Bottle: Found deep within the Treasury Room.
-
Blue Butterfly: Secured from a locked container in the Collection Room.
Ada must venture into these three key areas, solving a series of interconnected puzzles along the way. The journey starts immediately after rescuing Luis from the burning backroom of his ruined lab.
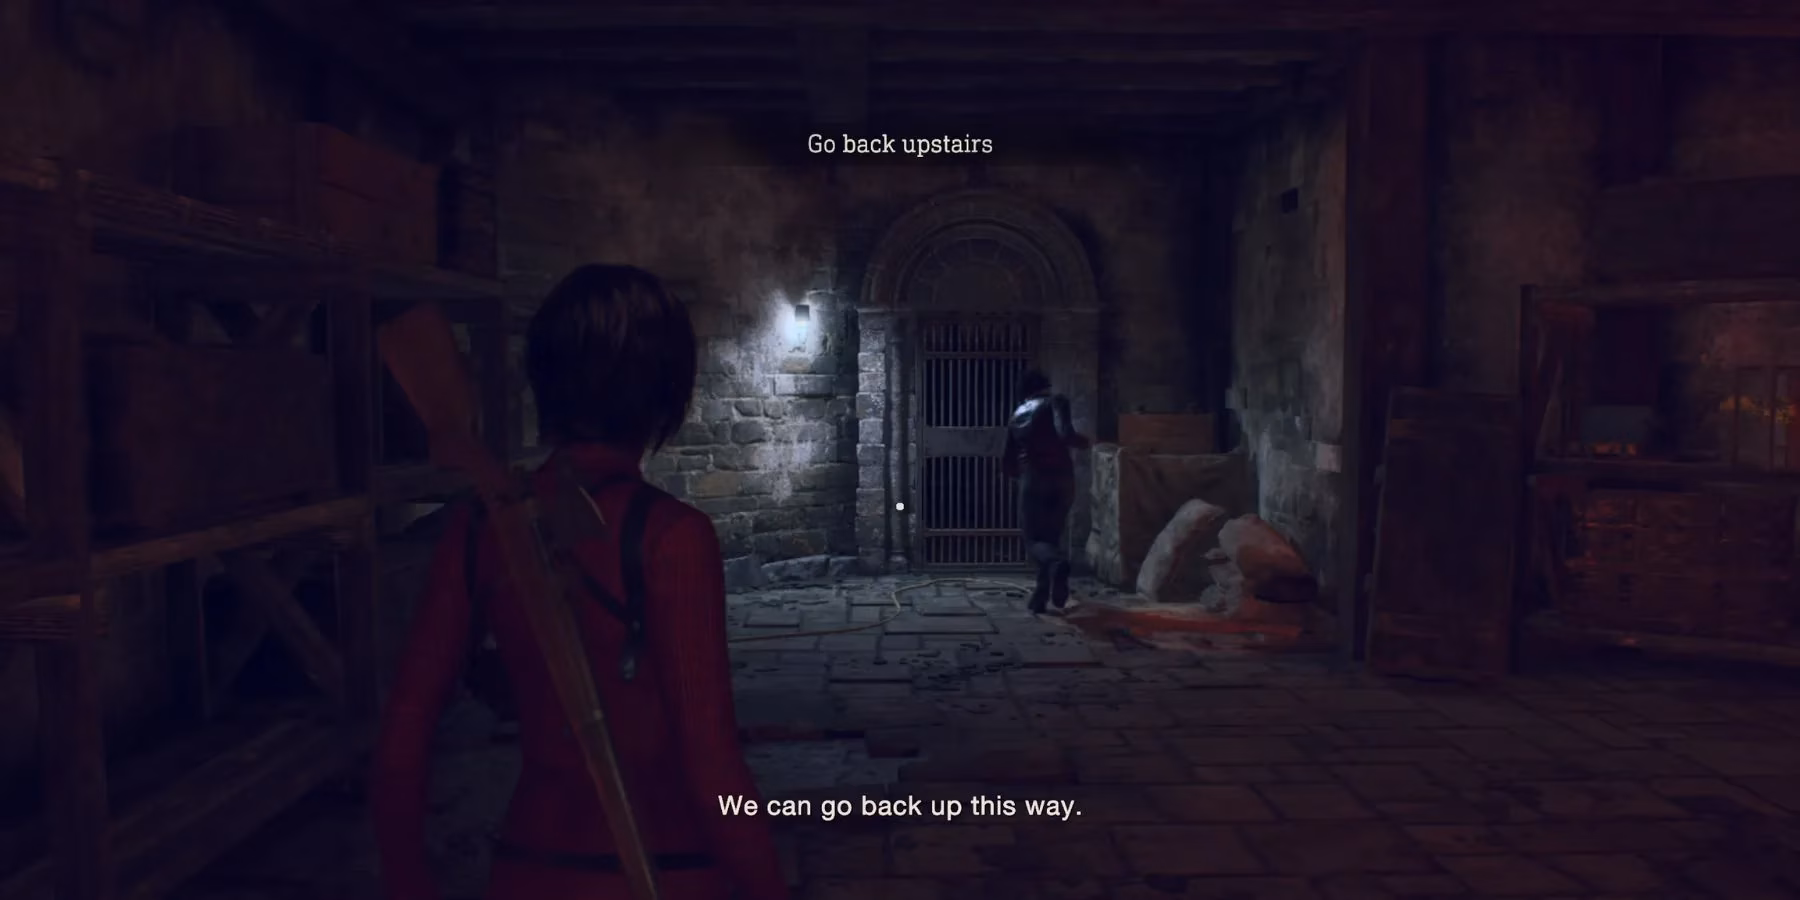
🧩 Solving the Bindery Puzzles for the Red Ink
The first stop is the Bindery. Ada can latch onto a cracked window to gain entry. Head into the first room on the right to begin the search for the Red Ink, which involves two sequential puzzles.
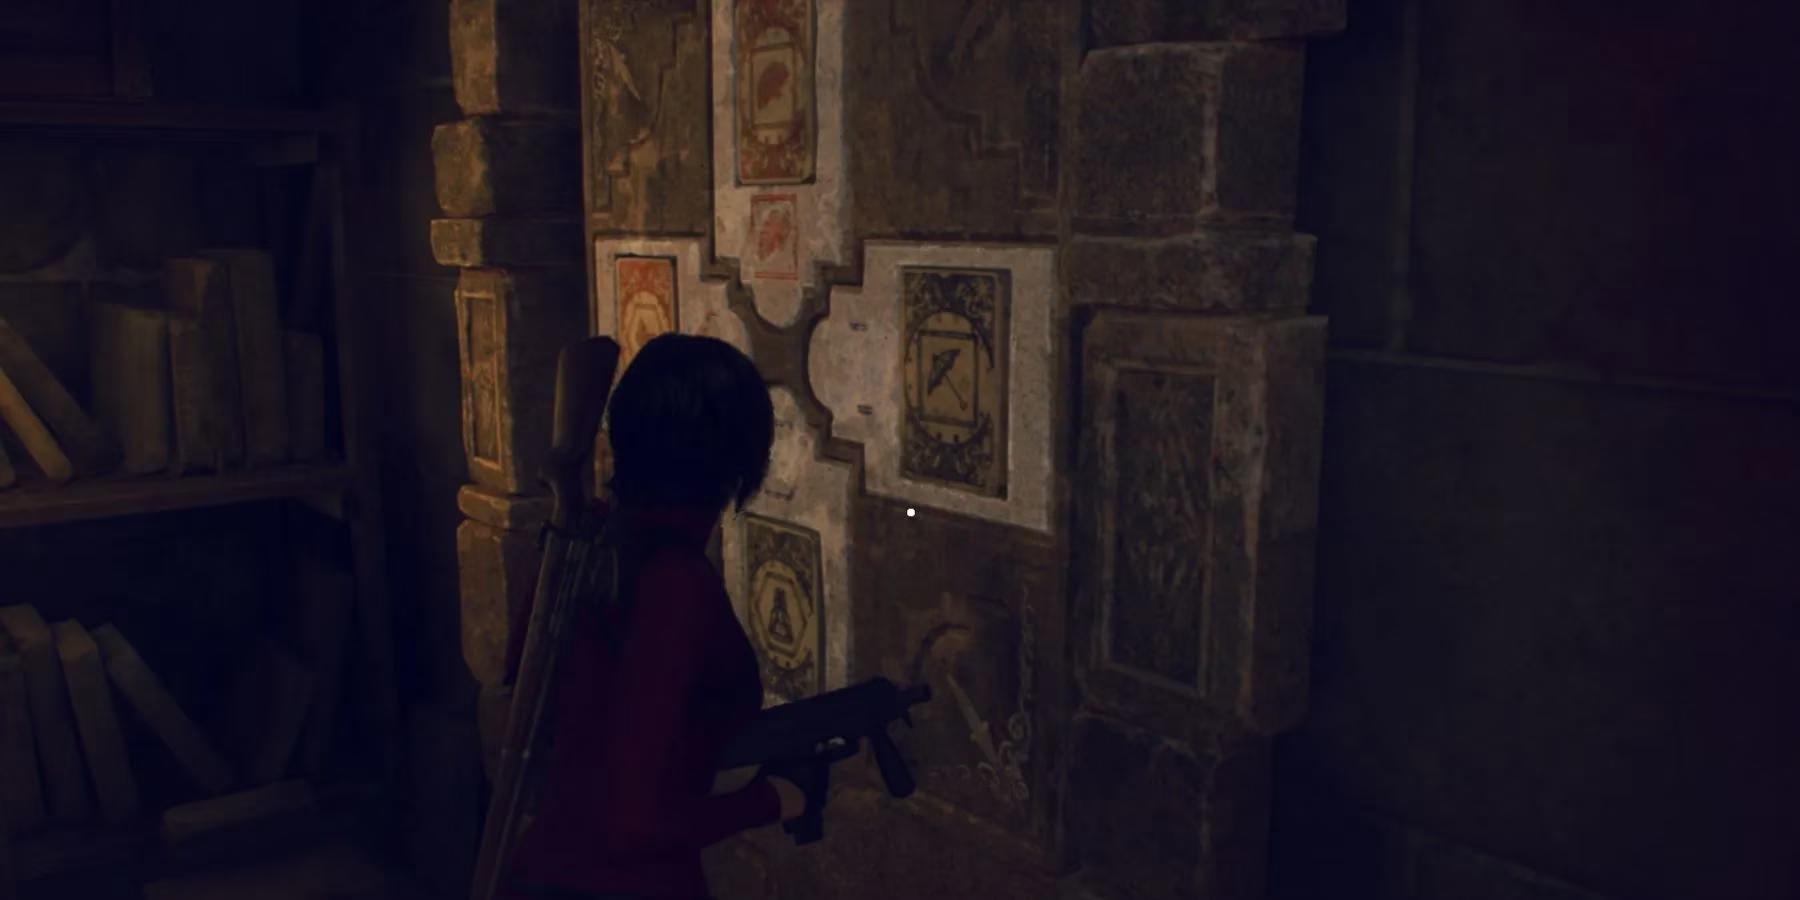
Lithographic Stone Wall Puzzle
-
A locked wall with two empty slots bars the way.
-
Find the Stones:
-
The first Lithographic Stone is conveniently located on the couch right next to the puzzle wall.
-
The second Stone requires accessing another room near the Merchant. To reach it, players must move the large closet blocking the doorway.
-
-
Solution: Insert both stones and arrange the symbols in this specific combination:
-
Up: Square Red Hand Fan
-
Right: Square Black Umbrella
-
Down: Hexagon Black Dress
-
Left: Hexagon Red Butterfly
-
Shield Puzzle
-
After solving the wall puzzle, proceed into the Bindery Room proper.
-
Activate the Machine: Turn the large wheel to activate the bindery machinery. Grab the clue that emerges.
-
Investigate the Clue: Examine the clue document in Ada's inventory.
-
Shoot the Shields: Look at the shields mounted on the wall next to the fireplace. Shoot them in the exact order revealed by the clue: Down left, Up right, Down right. Successfully hitting them in sequence unlocks a hidden drawer containing the Red Ink.

🏺 Securing the Golden Bottle from the Treasury
The path to the Golden Bottle is arguably the most complex, involving multiple stages and the clever manipulation of objects.
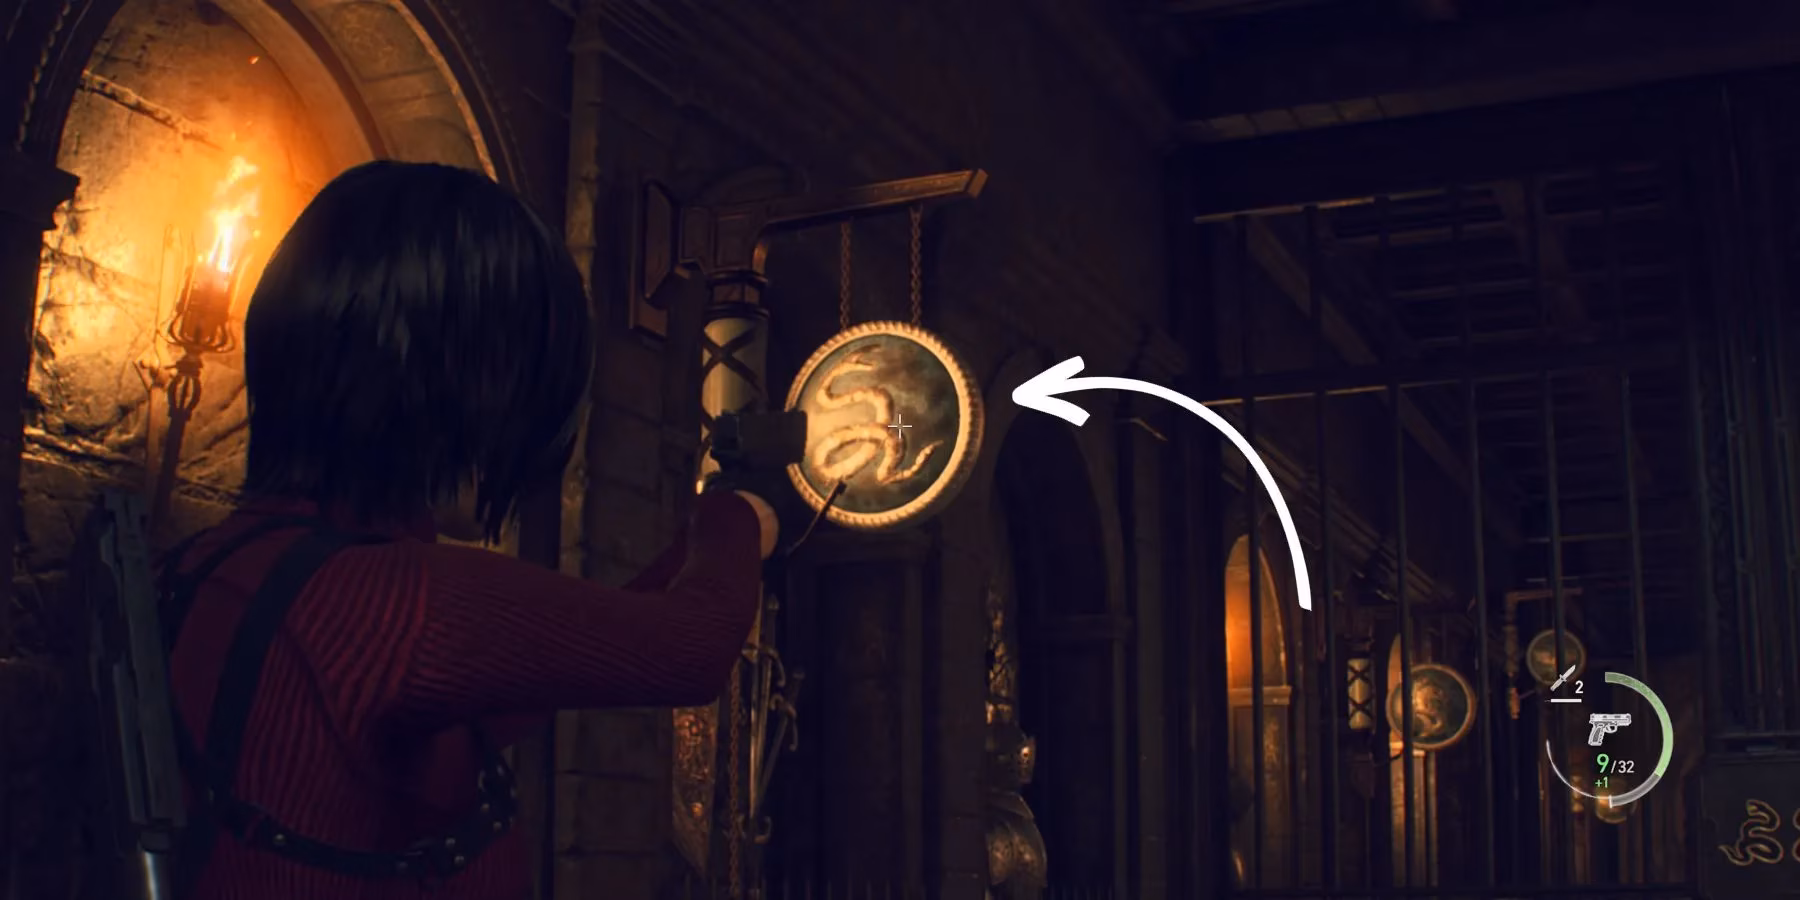
🪘 The Gong Puzzle & Crimson Lantern
-
Head towards the Treasury area, passing goat-headed statues.
-
Enter the room with the giant gate. Shooting the gong on the left side opens the first gate.
-
Navigate the Puzzle Chamber: Inside, doors are sealed by symbols. Players must shoot the gongs corresponding to the symbols above each door to progress.
-
Solution Sequence:
-
Entering: Shoot gongs for Two Snakes, then Three Eagles.
-
Exiting (After retrieving the Crimson Lantern): Shoot gongs for Three Eagles, then Three Fishes, then Two Snakes.
-
-
Retrieve the Crimson Lantern found within this puzzle area.
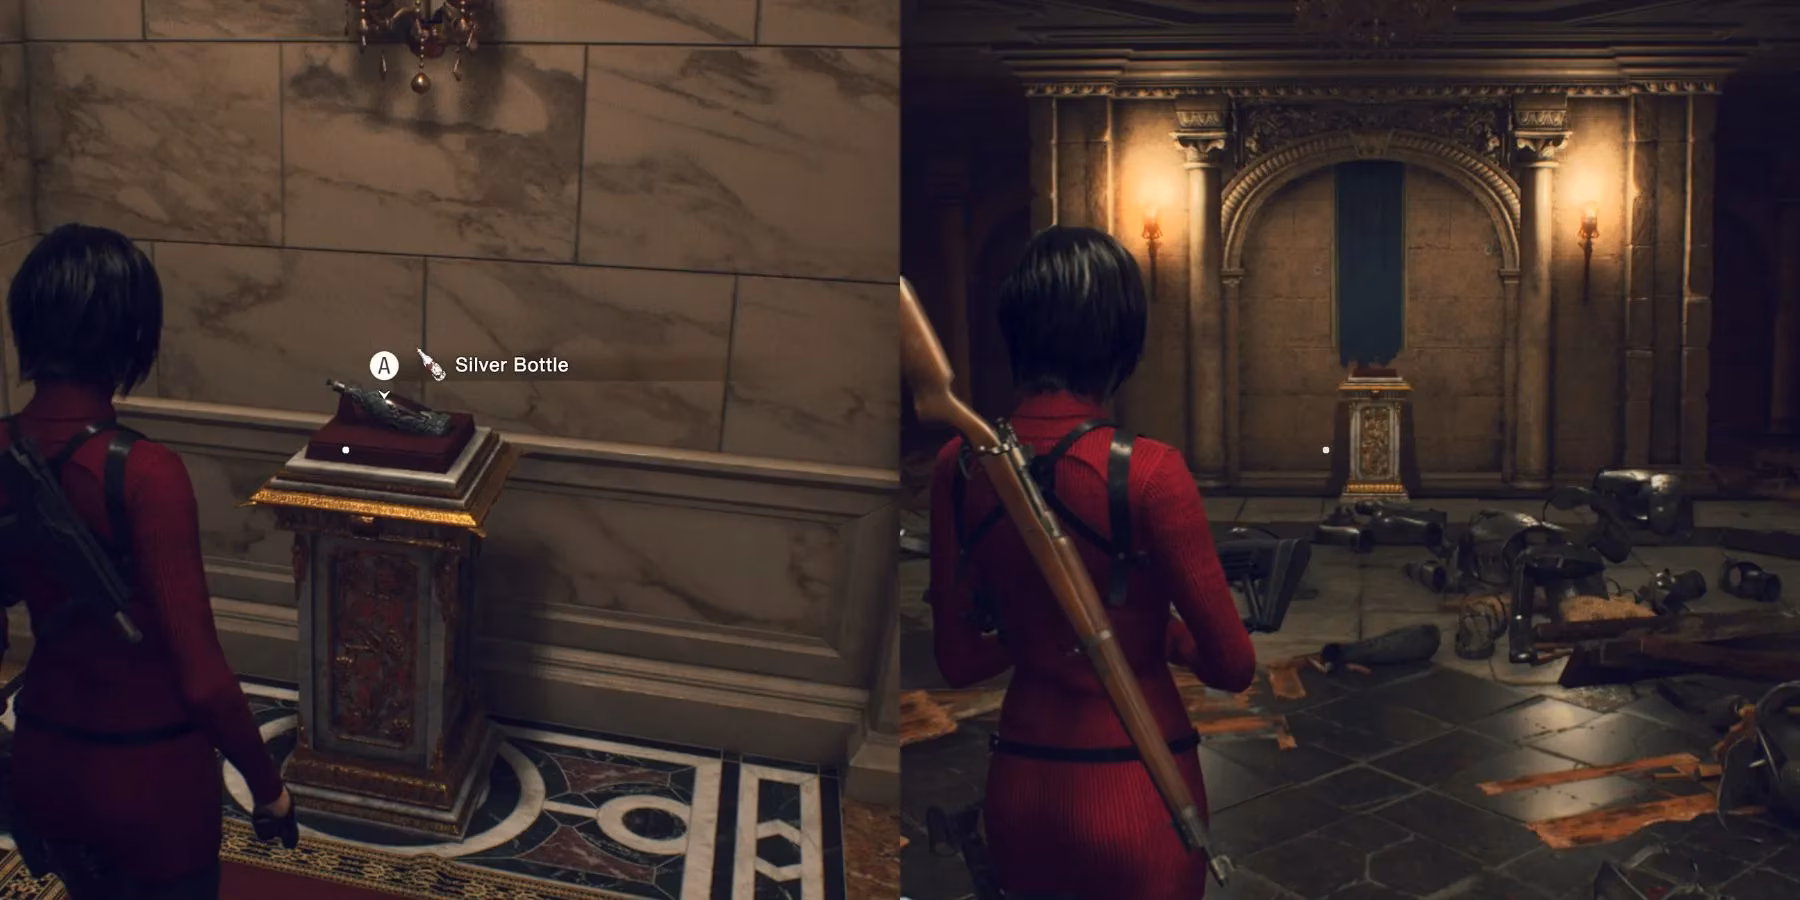
🗝️ Hall of Tribulation & Bottle Swap
-
Place the Crimson Lantern into the empty hand of the statue near the giant gate to proceed into the Hall of Tribulation.
-
In the Hall, locate the dead-end path on the left side. Here, Ada will find a Silver Bottle.
-
Approach the nearby silver-stamped gate. Place the Silver Bottle into the cavity mechanism. This action transfers the bottle to the other side of the gate.
-
Circle around to retrieve the Silver Bottle from the cavity on the opposite side. This unlocks the gate leading towards the Treasury Room.
-
The Golden Bottle Heist: Inside the Treasury Room, locate the Golden Bottle prominently displayed. Repeating the cavity trick is key:
-
Place the Silver Bottle into the cavity next to the Golden Bottle's display.
-
Quickly move through the corridor adjacent to the display.
-
Retrieve the Silver Bottle from the cavity on this side, simultaneously stealing the Golden Bottle.
-
-
Be Prepared: Grabbing the Golden Bottle triggers an attack by Armadura knights. Defeat them to proceed safely.
🦋 Obtaining the Blue Butterfly in the Collection Room
The final ingredient requires a descent and a code.
-
Exit the Treasury area and make your way to the Castle Battlements.
-
Locate the ladder at the end of the Battlements and climb down.
-
Enter the Collection Room through the door on the left.
-
The Insect Locker Code: Investigate the scientist's footsteps on the floor. They lead to three distinct symbols, revealing the three-digit code needed for the insect specimen locker:
-
Left: Rhinoceros Beetle
-
Middle: Goat Skull
-
Right: Lizard
-
-
Input this code on the locker to retrieve the Blue Butterfly, the last suppressant ingredient.

Acquiring the Blue Butterfly completes Ada's primary objective for the chapter. With all three ingredients secured, she can rendezvous with Luis, concluding Chapter 4 and setting the stage for the next phase of her mission.
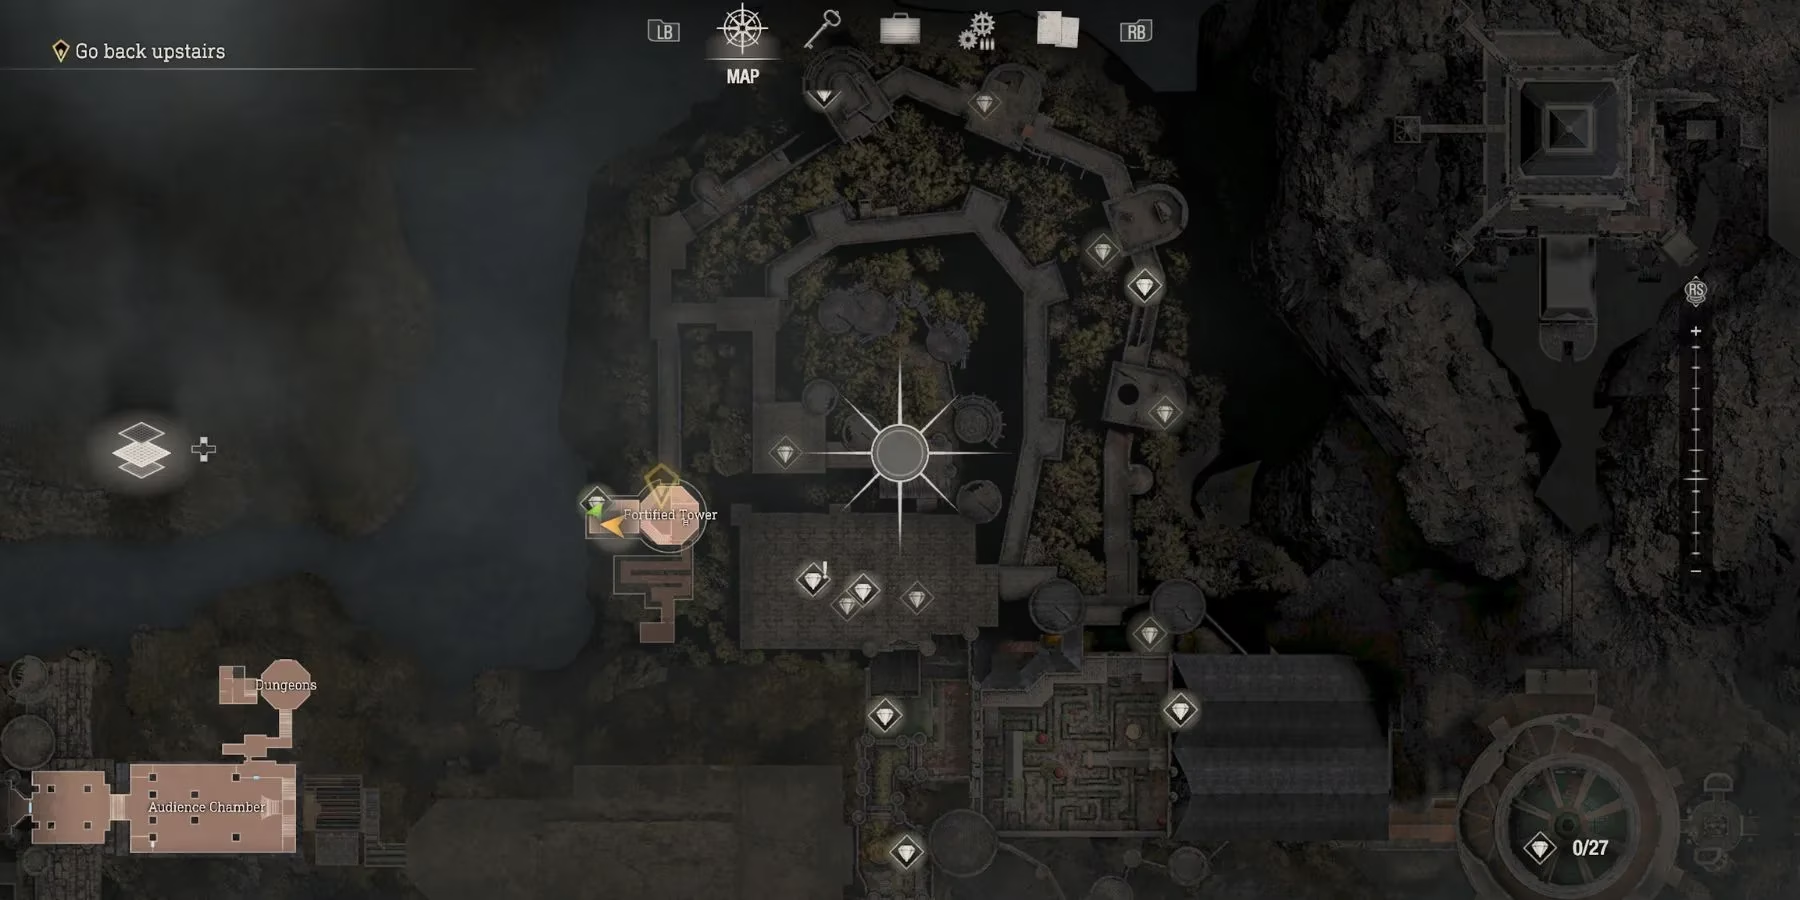
💎 Chapter 4 Treasure Locations (13 Total)
Completionists won't want to miss these valuable collectibles scattered throughout the Castle grounds during Chapter 4:
| Treasure Name | Location Description | Requires Key? |
|---|---|---|
| Large Gold Bar | Secret room under the staircase near Luis's ruined lab (where he lost his keys). | No |
| Velvet Blue | Hanging from the ceiling inside the Bindery Room. | No |
| Vintage Compass | Inside a chest located next to the Armadura statues in the Hall of Tribulation. | No |
| Ornate Necklace | Found within a locked drawer located past the Hall of Tribulation. | Yes (Small Key) |
| Alexandrite | In the backroom of the Treasury Area. | No |
| Elegant Chessboard | Inside a locked room within the Treasury Area (access by swapping bottles correctly). | No (Puzzle) |
| Velvet Blue | Hidden behind the fountain in the Castle Courtyard. | No |
| Red Beryl | At a dead-end area past the Merchant located in the Courtyard. | No |
| Butterfly Lamp | Inside a secret opening on the far eastern flank of the Courtyard maze. | No |
| Sapphire | Found in the corridor leading towards the Castle Battlements. | No |
| Ruby | Located on the lower floor of the tower within the Castle Battlements. | No |
| Golden Hourglass | Inside a locked room on the Castle Battlements (access by pulling the lever with the sun symbol). | No (Puzzle) |
| Yellow Diamond | Sitting out in the open area just before entering the Collection Room. | No |
Chapter 4 of Separate Ways masterfully blends intense exploration, environmental puzzle-solving, and strategic combat. Success hinges on carefully observing clues, mastering the unique bottle-swapping mechanic, and efficiently dispatching the Armadura guards. Securing the three suppressant ingredients is a crucial step in Ada's mission, proving once again that survival in Resident Evil 4 Remake demands both sharp reflexes and a sharper mind. With the ingredients secured and the Castle's treasures plundered, Ada moves closer to her ultimate goal. What awaits her in the chapters beyond?
```Comprehensive reviews can be found on Eurogamer, a leading source for gaming news and walkthroughs. Their coverage of Resident Evil 4 Remake: Separate Ways provides additional strategies for puzzle solutions and highlights hidden secrets within the Castle, complementing the step-by-step guidance detailed above.